Disclaimer: This post contains affiliate links, which means I make a small commission when you make purchases through them.
Product Details
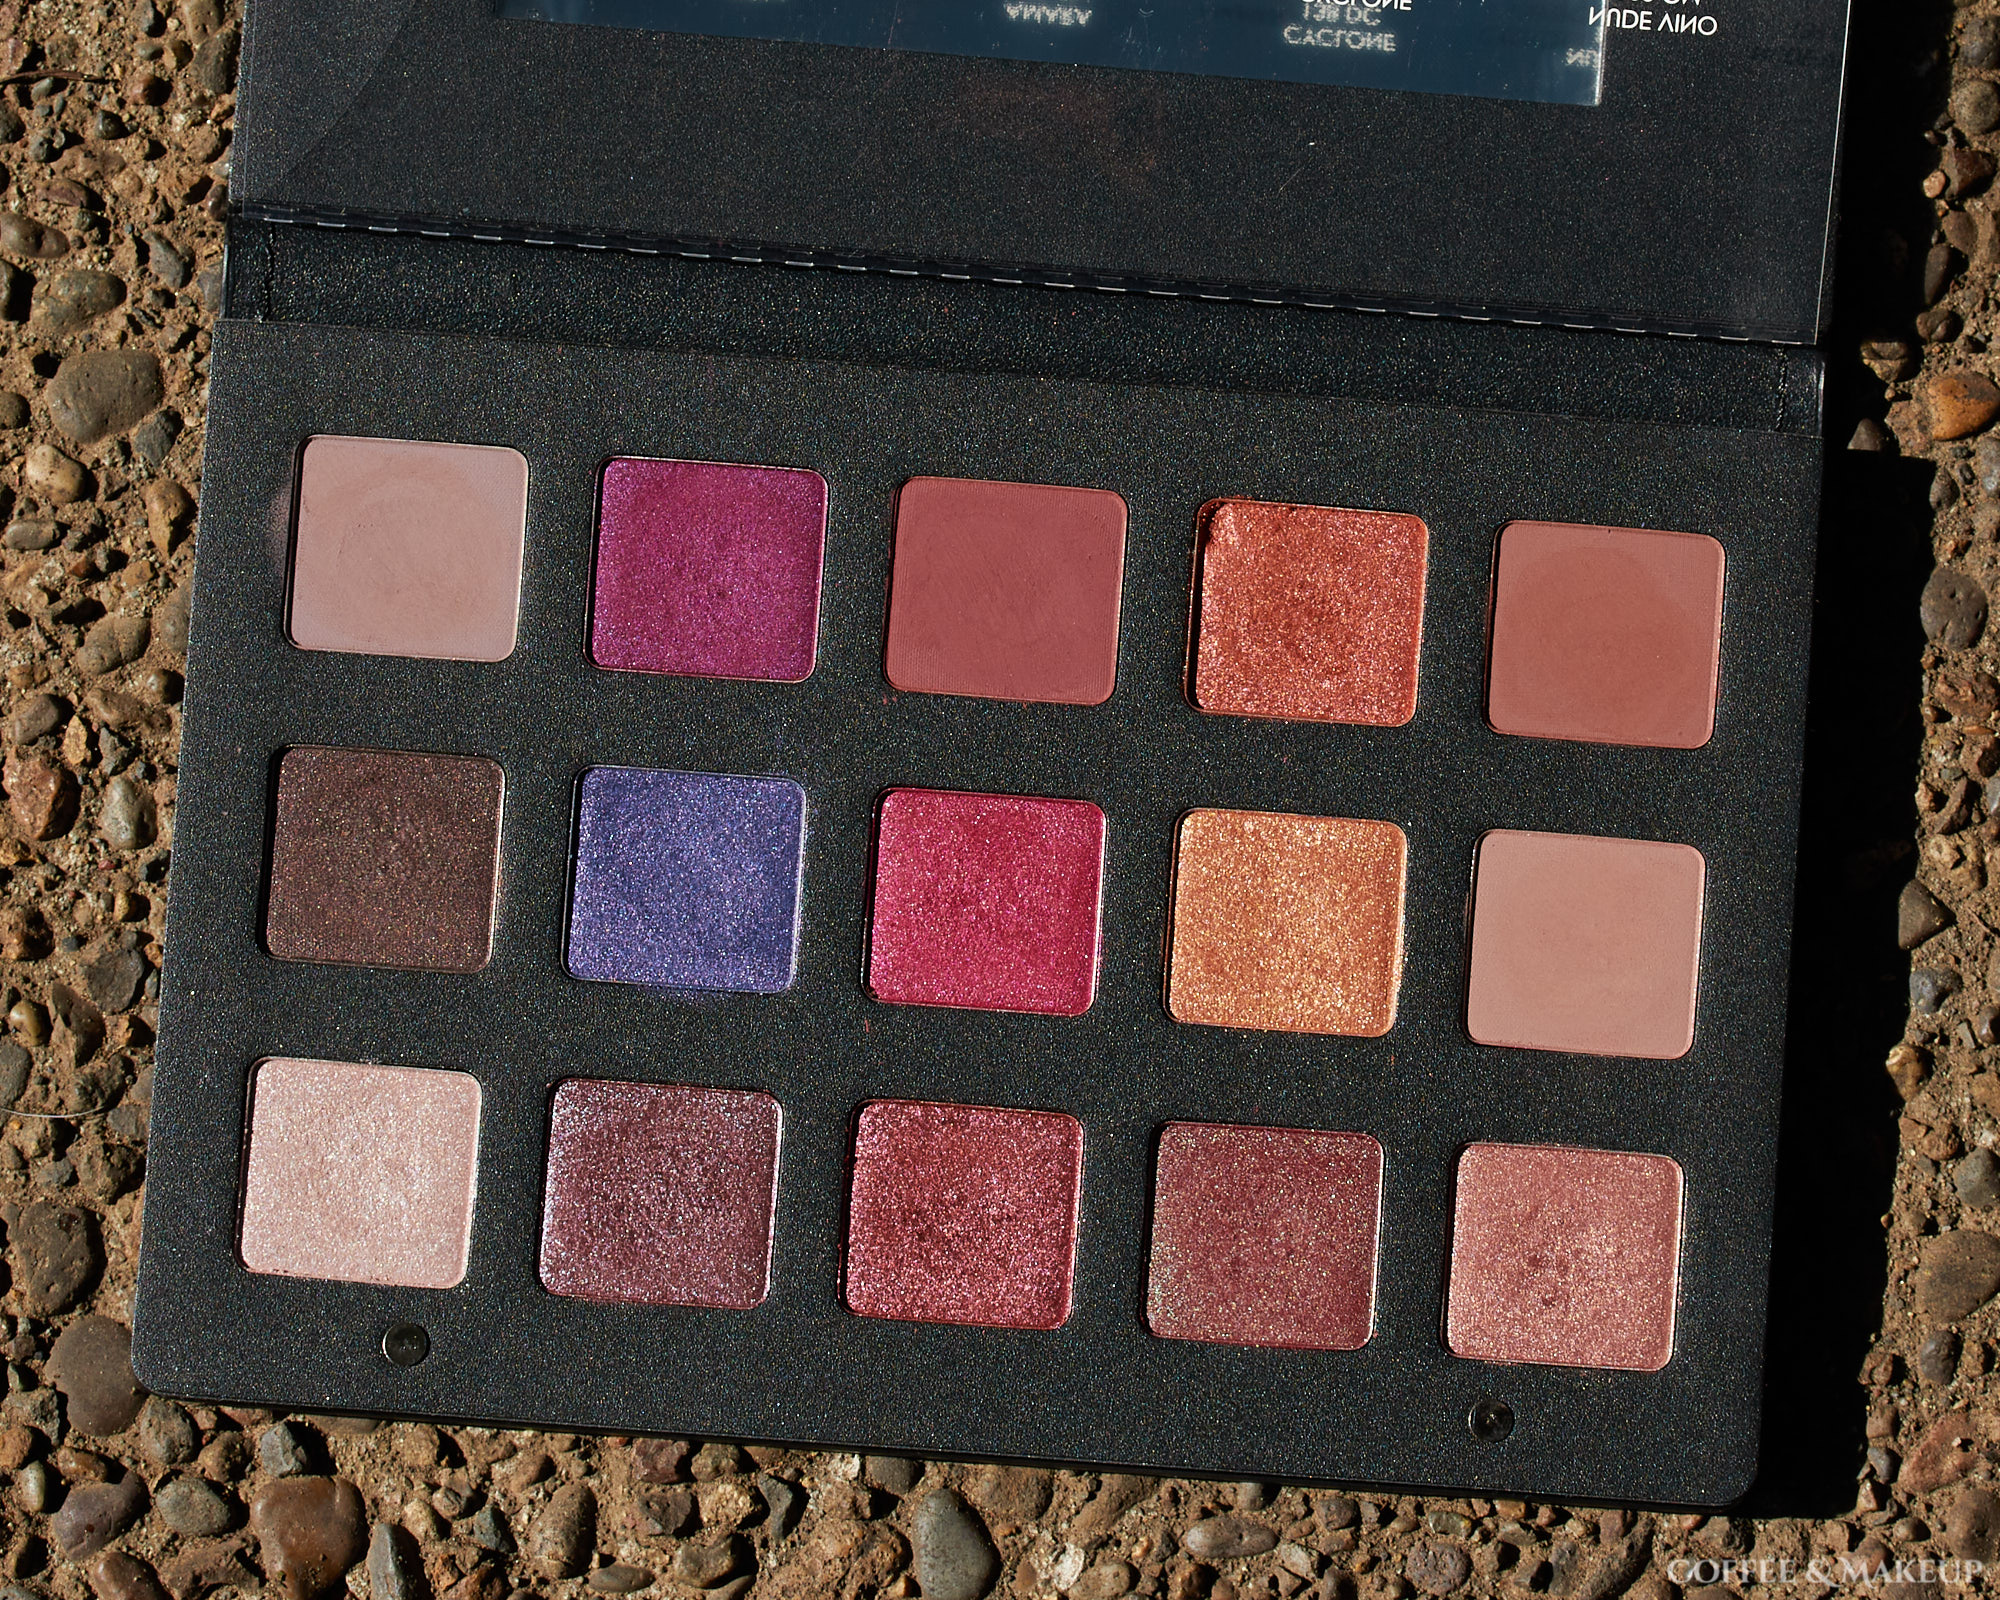
The Natasha Denona Lila Palette is one of the brand’s older palettes and was one of the first to cater to those looking for a purple palette. At the time, I remember there not being a whole lot of options for palettes that had lots of purple shadows in them. There are 4 mattes and 11 shimmers. Nearly all the purple shades are shimmer with the exception of Per Se, which is a grey with subtle purple tones. There are also pink, red and orange toned shades that complement the purples nicely. Each shade is 2.5 grams / 0.08 oz and the palette retails for $129.
Formula Overview
Of all the Natasha Denona palettes I tried, the mattes in this palette were my favorite. Per Se was the trickiest to work with as it had a tendency to dust away more easily than the other three mattes. Given that drawback, I still appreciate having it in the palette because of its cooler, greyish purple undertone. The other three mattes were a joy to work with. It was just as quick and easy to build up color payoff as it was to blend them out. They also sat on the skin in a flattering way.
The shimmers were also quite nice. They were more of your old-school type of standard shimmer that have a uniform, fine texture to them with very little fallout. None of them had any chunky, large particles and they also weren’t particularly metallic or shiny. They were easy to pick up and apply with brushes and didn’t seem too dry or emollient.
Shade Selection
As I was making my way through the Natasha Denona palettes, I found myself dreading this one the most. It’s funny because it surprised me the most as well. There is more versatility and color variation than I originally thought. I do think that there could have been some improvements, though. A deeper matte would have been nice as well as maybe a lighter matte. Nude Mauve and Nude Vino were just a little too similar for my liking. The four deeper shimmers in the bottom row aren’t necessarily too similar but perhaps more variation in depth would have been nice.
Wear Time
Wear time was generally shorter with these shadows. Looks where shimmer was predominantly all over the lid creased pretty quickly on me – within a few hours. The mattes seemed to wear longer but still creased a bit earlier in the day than I’d prefer.


Looks

Look #1:
- Nude Mauve – Outer transition area
- Nude Vino – Outer crease
- Per Se – Inner crease
- Purpure – Inner lid
- Amethyst – Center of lid
- Layla – Outer lid
- Magnolia – Inner corner

Look #2:
For this look, I did some mixing of shades on the center of the lid/crease. I went back and forth with the shimmery orange, pink, and gold till I got the brightness I was looking for. The shades are listed in the order I used them, for the most part, until I mixed them.
- Amara – Inner/outer crease
- Cyclone – Center of crease
- Viola – Inner/outer lid
- Magnetic – Center of lid
- Magnolia – Used this to brighten center of lid/crease
- Juneau – Inner corner
Lower lashline mirrors the upper lid with the shimmery shades.

Look #3:
- Amara – Above crease, lower lashline
- Per Se – Crease, lightly on lid
- Magnolia – Center of lid, inner corner
Other stuff used:
- On Holiday from the ColourPop Bare Necessities Palette – Transition
- Whisker from Menagerie Cosmetics – Deepen crease
- Fenty Fly Pencil in Bachelor Pad – Waterline

Look #4:
- Nude Vino – Outer half of lid/crease
- Per Se – Inner half of lid/crease
- Helio – Center of lid, inner corner

Look #5:
- Nude Vino??? – Inner/outer crease
- Magnetic – Center of crease, outer edge, inner lower lashline
- Dragon Bite – All over lid
- Magnolia – Inner corner, center part of lower lashline, very outer edge
This is what happens when you don’t immediately note which shades you used where. You can’t remember which one exactly you used 🤦🏻♀️